1st Step:
Go to:
data\texture\À¯ÀúÀÎÅÍÆäÀ̽º\collection
Add your sprite for Example:
Blood_Helm.bmp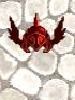
data\texture\À¯ÀúÀÎÅÍÆäÀ̽º\item
Blood_Helm.bmp
2nd Step:
Go to data folder and open as notepad: idnum2itemdesctable.txt
17000#
Str + 10
Class :^777777 Headgear^000000
Defense :^777777 0^000000
Equipped on :^777777 Lower^000000
Required Level :^777777 ??^000000
Weight :^777777 10^000000
Applicable Job :^777777 Every Job^000000
#
Go to data folder and open as notepad: idnum2itemdisplaynametable.txt
17000#Blood Helm# //<---------------- In-game name
Go to data folder and open as notepad: idnum2itemresnametable.txt
17000#Blood_Helm#
3rd Step:
Go to:
data/sprite/¾ÆÀÌÅÛ
This file (¾ÆÀÌÅÛ) is for Drop item which is .act and .spr
Blood_Helm.act and Blood_Helm.spr
4th Step:
Go to:
data\sprite\¾Ç¼¼»ç¸®\¿©
Put the following files, This sign "¿©" is for Female Character.
¿©_Blood_Helm.act and ¿©_Blood_Helm.spr
5th Step:
Go to:
data\sprite\¾Ç¼¼»ç¸®\³²
Put the following files, This sign "¿©" is for Male Character.
³²_Blood_Helm.act and ³²_Blood_Helm.spr
6th Step:
Go to: data\lua files\datainfo
Open accessoryid.lua as Notepad
<TAB>ACCESSORY_BLOOD_HELM = 1001,
Open accname.lua as notepad
<TAB>[ACCESSORY_IDs.ACCESSORY_BLOOD_HELM] = "_BLOOD_HELM",
7th Step:
Also config it to the server, go to db/item_db2.txt or db/import/item_db.txt at the last line of notepad or Wordpad,
for example:
17000,Blood_Helm,Blood Helm,5,20,,100,,1,,1,0xFFFFFFFF,7,2,256,,10,1,1001,{},{},{}
<----You'll see "1001" at the last part, that will be your View ID that you put on accessoryid.lua
*Note: If you are using 2013 Client, you have to edit and add your custom item description inside to System/ItemInfo.lub and System/ItemInfo.lua, find it inside of your RO main folder.
Example:
[17000] = {
unidentifiedDisplayName = "Blood Helm",
unidentifiedResourceName = "Blood_Helm",
unidentifiedDescriptionName = {
"Str + 10",
"Class :^777777 Headgear^000000",
"Defense :^777777 0^000000",
"Equipped on :^777777 Lower^000000",
"Required Level :^777777 ??^000000",
"Weight :^777777 10^000000",
"Applicable Job :^777777 Every Job^000000"
},
identifiedDisplayName = "Blood Helm",
identifiedResourceName = "Blood_Helm",
identifiedDescriptionName = {
"Str + 10",
"Class :^777777 Headgear^000000",
"Defense :^777777 0^000000",
"Equipped on :^777777 Lower^000000",
"Required Level :^777777 ??^000000",
"Weight :^777777 10^000000",
"Applicable Job :^777777 Every Job^000000"
},
slotCount = 1,
ClassNum = 0
},
